Many desktop 3D printers are not sold with an enclosure. While this saves on cost, teachers may need enclosures to keep the printer and students safe. Enclosures can help reduce noise, as well as keep the print warm and reduce the risk of warping.

Aftermarket enclosures make with laser cut or molded acrylic are available from many 3D printer company’s, but they tend to cost $200 – $300 USD. This is cost prohibitive for many 3D printers. Makers have turned to hacking IKEA furniture to make DIY enclosures, or making custom boxes for their printers.
While these are fine solutions if you like IKEA (I personally don’t get the appeal of IKEA at all) I have been thinking of a low cost solution using PVC pipes for a while.
That’s what I was thinking…
Have you ever had half an idea that you thought about and then put in the back of your mind for a latter time?
I was thinking about 3D printing some brackets for PVC pipes and making a enclosure. Then in a Facebook group Pauldude000 showed the PVC enclosure he made for his printer.

His design was what I had in the back of my mind for a while. A K.I.S.S. PVC frame that could be easily modified to enclose a printer.
Enclosing the Mini 1
I had an opportunity to get a affordable Lulzbot Mini 1 that I want to use at trade shows. A working printer always draws a crowed, and an enclosure would make sure kids and engineers keep their hands out.
After downloading the Pauldude000’s original file, I gathered the PVC and a pipe cutter for the project. A cut list and dimensions can be found on my TeacherPayTeacher page.
The original corner brackets were a few hundredth of a mm too small for the PVC pipe. I first used a Dremel tool to try to ream out the brackets. That was not a good idea as the bit got so hot it started melting big globs and leaving rough spots the PVC would not slide into.

Whenever I hit this issue, my go to fix is printing another object scaled up by 0.01-0.02% more. Doing this I got a snug fit with the PVC. After cutting up the PVC and starting to lay out the corners, I also started planing how to mount the foam core board to the PVC pipes.
Remixing the brackets
When I looked at Pauldude000’s frame, I saw that some accessories like lights or camera mounts could be added to the frame. I also wanted to cut some slots into the brackets to hold the foam board material. With these changes in mind I used TinkerCAD to modify the corner brackets. I wanted to create a clear path for a powercord to go through the corner bracket. By cutting of some material and adding the channels, I also shaved of 45 minutes of print time for the corner bracket.

I also make some pipe clamps to help hold the board to the pipe. With these I could use M3 or M8 nuts & bolts to clamp the board.
Covering the frame
As I was assembling the foam board, I was thinking about how to light the build area of the printer. The foam board is opaque, and I’d like the public to see a working printer. I’ve seen enclosure projects that use custom cut acrylic sheets, but that was not something I wanted to do for a prototype frame.
In looking at other enclosure designs, I’ve seen printers use other affordable material. Translucent shower curtains, clear drop cloth tarps, food wrap, and other plastic sheeting has worked for these frames.
I went to a local hardware store to see what options were available. A small role of 2 mil clear drop cloth may work to enclose your frame.

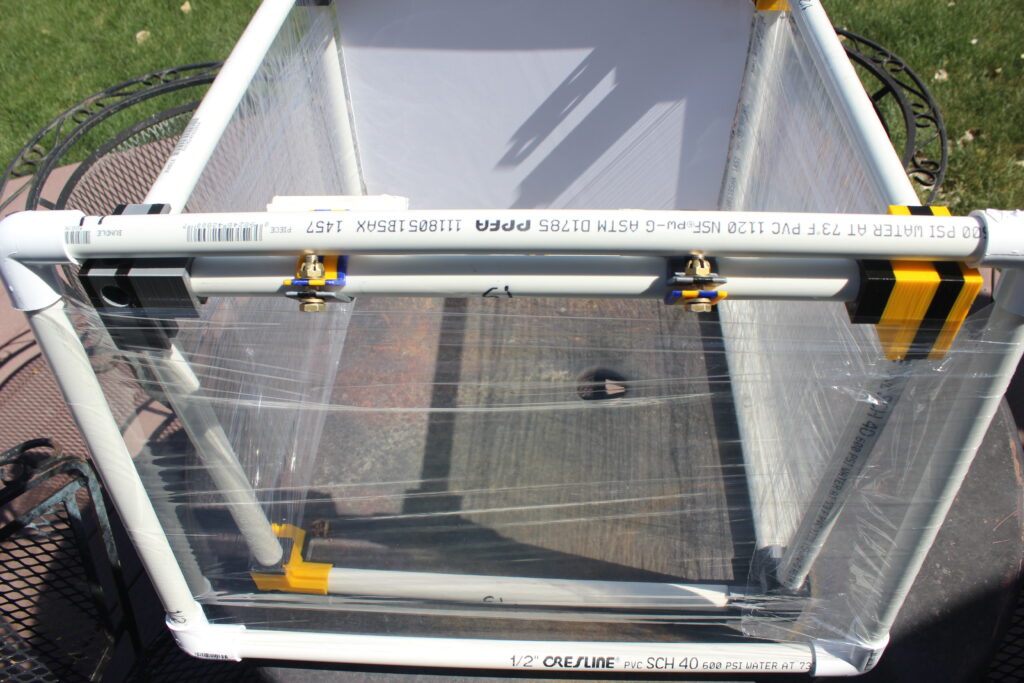
When I tried using the drop cloth, it was semi-transparent. If you wanted to make a light box, this material would work well, but it was not what I wanted. After this I pulled off the drop cloth and went with the kitchen shrink wrap.
For the door I just decided to use the right angle PVC connectors to make a simple frame. After wrapping it with shrink wrap, I set it on top of the brackets for the light. In the future I may make a hinge, but sense the door is not opened frequently, I figured this would work.
Let There be Light
I also wanted to see about mounting a light in the frame. A quick trip to a hardware store resulted in me purchasing spare PVC cutoffs, pipe connections, and LED work lights that I can mount anywhere on the frame.
I was looking at LED strips, rope lights and other LED lighting options. Based on your needs you may go with a different option, but this was a prototype enclosure. Thinking ahead I wanted a lighting option that could run off a battery, and could easily move to other projects.
To be flexible I found a LED task light that has magnets to mount, and is USB chargeable. This light can attach to a large flat washer that mounts to the M8 bolt. Having a flexible light bar gives me options in the future to put it on other projects. It also makes it easy to transport and not worry about cables if my power is limited at a booth.
What’s up, just wanted to mention, I enjoyed this post.
It was practical. Keep on posting!