When it comes to getting into your home, we have all had the universal experience of locking ourselves out of the house. There are many videos of clever ways to hide a key outside of your house, from hidden electrical pipes to key rocks. In this blog I’ll cover how I made a flexible mold to cast a key rock in cement.
Recently I had the universal experience of leaving my keys in my room. After some cursing and panicking, I remembered that I had a hidden key rock. After digging it up from an undisclosed location, I was disappointed to find that the hidden key had badly corroded. The key rock was made before I was born. Cast in resin, the rock had a flimsy plastic slip covering the compartment for the spare key. Years ago that plastic slip deteriorated, and had been covered with duct tape. I wanted to make a more durable water resistant box for the next key. While I could go all out and make a sealed waterproof box, this is for a key rock that will only see limited use over the lifetime of the house. A flexible mold would be a great way to make multiple key rocks.
Casting a New Key Rock
I could have just knocked out another cover slip for the compartment on my 3D printer, but where is the fun in that?
I’ve been exploring making flexible molds for cement casting with flexible filament. After making candle holders from flexible molds, I wanted to see if I could also incorporate a 3D printed plastic item into a cast form.
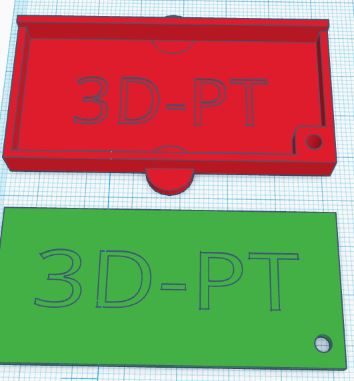
The first step was to make a box to hold the key. In my first iteration I made a lid that pivoted from a corner, using a pin made from scrap 3 mm filament. The idea was that this box is more sturdy then a simple slip. From previous experiments I know that most 3D printing filaments will last for years outdoors. After designing the key box in TinkerCAD, I printed some different versions in Colorfabb economy PLA.
Molding a Rock Take 1
The key box is designed to be set into the wet cement, with the lid protruding just below the base level of the rock.
The next step was trying to mold a rock. You would think after spending 2 years studying geology, I would know how to cast a realistic rock. Then again, geologist don’t cast rocks, they break them apart.
Because I do not have a fancy modeling program, I wanted to see first if I could physically make a mold using fine wet sand.
The results after casting were…. disappointing. I used a sandwich bag as a barrier between the sand and the cement. The resulting cast came out looking like a polished glob. The plastic bag left a smooth surface texture, and the folds of the bag creased into the casting, leaving creases that were too straight for a rock.
Flexible Mold a Rock Take 2
In the second attempt I decided to just hack around in TinkerCAD and see what I could make.
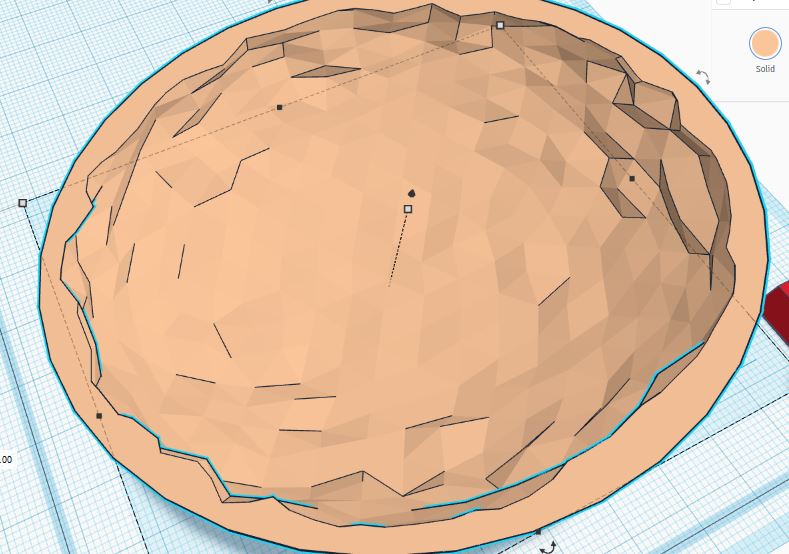
TinkerCAD shape generator menu I found a facet sphere shape that I could smooch and tweak into a rough rock. After cutting it in half and sticking it into half sphere shape, I had a rock shaped mold ready for exporting.
Flexible mold 3D printed in NinjaFlex TPU filament. Photo by author
After 3D printing the mold in Ninja Flex, I used a 2 part fine sand to 1 part Portland cement mix to pour into the mold.
After pouring the cement, I place the key box down into the wet cement and shook the mold to form the cement around the box. I also used packing tape to hold the key box level.

Final Key Rock
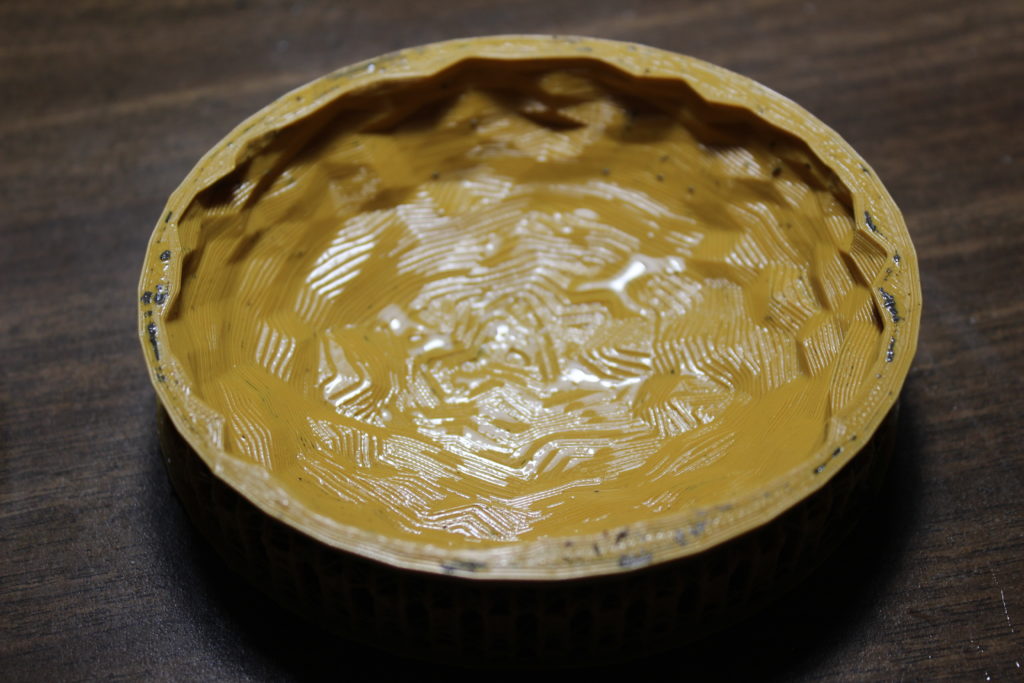
The final key rock turned out great. With a rough gray appearance, the key rock will easily hide in a rock garden full of granite rocks. You could use a rough sanding block to rough out the layer lines that are showing, though for me they may help me find the rock in the future. In an earlier cast I found that wetting the mold and spreading a fine layer of sand gave a coarser finish that conceals the layer lines in the cast.

If you would like to purchase a hide a key rock from the author, they are now on sale through the authors Etsy store.
3 thoughts on “Key Rock Project”
Comments are closed.